
Are you looking for a unique, easy, and fun acrylic painting technique to create amazing textures and backgrounds?
Today, I’d like to share a rather unique experiment with you: painting with bubbles!
Yes, real bubbles.
With just acrylic paint, water, a little dish soap, and a straw, you can create organic patterns made up of circles, translucent effects, and layers.
This is a particularly interesting technique in abstract painting because it introduces an element of chance while still leaving plenty of room to refine the result later.
And most importantly: you don’t need to be experienced with acrylic paint to give it a try.
Let’s take a look at how to do this.
Why use acrylic paint bubbles?
What I like about this kind of technique is that it helps you overcome the infamous fear of the blank page very quickly.
Instead of immediately trying to create a perfect composition, we’re going to come up with an initial result.
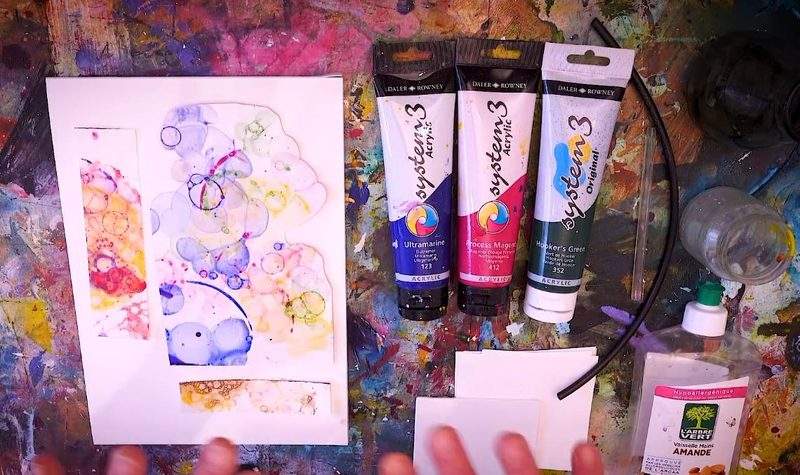
The bubbles will deposit the paint onto the surface and create shapes that we probably would never have drawn on purpose.
From there, we have several options:
- create a composition using only speech bubbles;
- layer multiple colors;
- use the result as the background for an abstract painting;
- apply glazes;
- draw over it;
- create shadows;
- add projections;
- to outline certain shapes;
- Then work with Posca-type markers.
So it’s much more than just a little bit of fun.
This technique can serve as the starting point for a true abstract painting.
The necessary equipment
Good news: You probably already have almost everything you need at home.
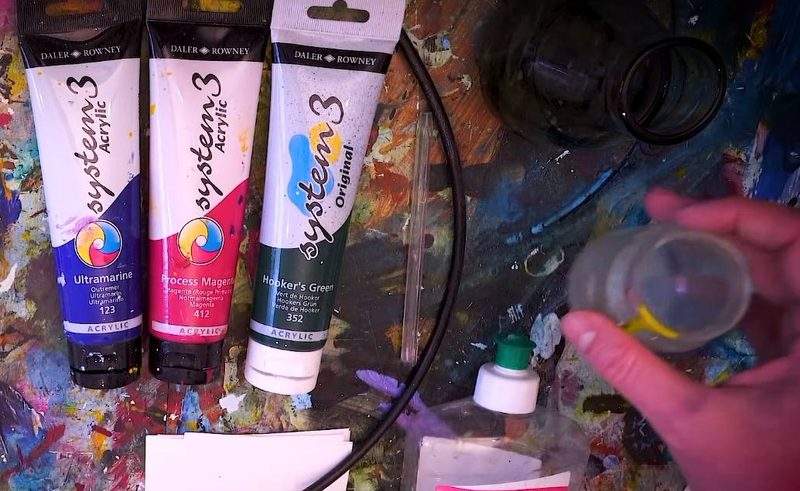
You will need:
- acrylic paint;
- water;
- dish soap or liquid soap;
- a small container, preferably made of glass;
- a brush or a small stick for stirring;
- a straw or a small tube for blowing;
- thick paper, Canson paper, or a small piece of canvas-backed cardboard;
- old clothes or an apron.
To start with, I also recommend choosing a relatively dark color.
Ultramarine blue works particularly well.
You can also experiment with black, purple, sienna, or another shade that’s dark enough.
Why?
Because dark colors make it easier to see the variations in opacity and the different levels of transparency left by the bubbles.
Even with just one color, you can already achieve a wide variety of shades.
How do you make the mixture for blowing bubbles?
This is probably the most important part of this technique.
There isn’t necessarily a one-size-fits-all recipe that’s precise down to the milliliter: you’ll have to experiment.
Start by putting a small amount of acrylic paint into your container.
Next, add dish soap. For my first few attempts, I use less dish soap than paint—about half as much.
Mix.
Then gradually add a little water.
The goal is to create a mixture that is liquid enough to easily produce bubbles, but contains enough paint so that the bubbles leave a visible mark when they burst on the surface.
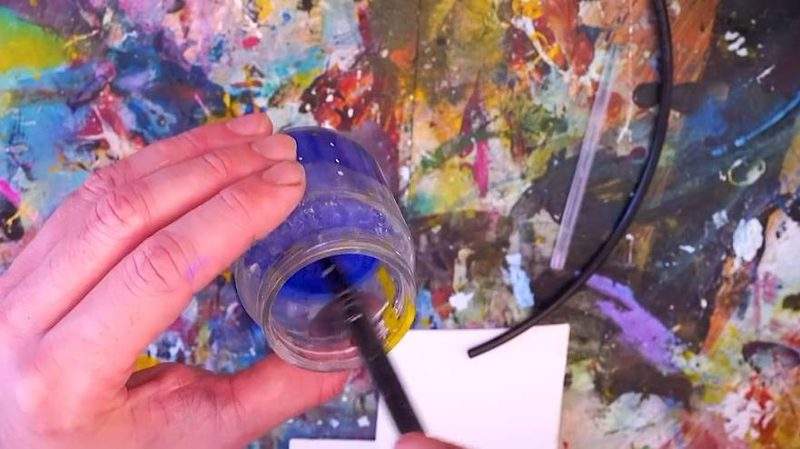
And that’s exactly where it all comes down to.
Too much water
If your mixture contains too much water, the marks left by the bubbles may be very faint and not very distinct.
This might be a good option if you’re looking for a lot of transparency, but you’ll have less contrast.
Not enough water
Conversely, if the mixture is too thick, it becomes difficult to produce enough bubbles.
Not enough dish soap
You’ll also have a harder time creating a thick foam.
So the idea is to gradually find the right balance between paint, water, and dish soap.
Don’t make a huge batch the first time you try it.
Use small amounts and adjust your mixture gradually.
How do you paint with bubbles?
Once your mixture is ready, grab your straw or small tube.
Place it in the container and blow to create bubbles.
Of course, be careful not to vacuum it up!
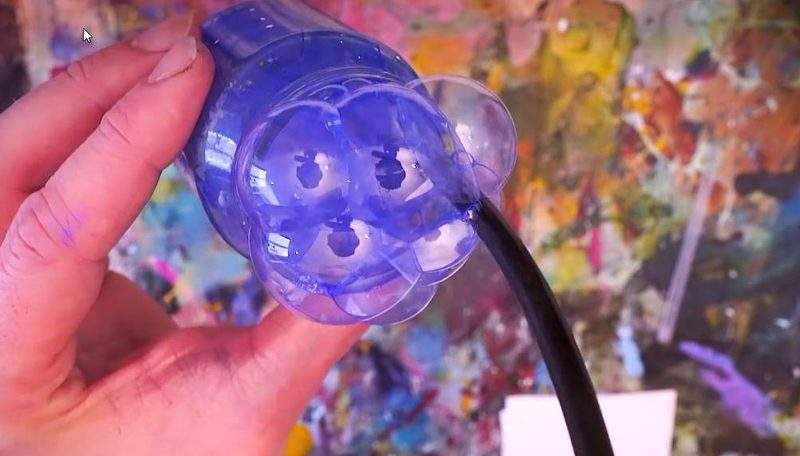
When the bubbles extend far enough beyond the edge of the container, take your sheet of paper and place it very gently on top of them.
Don’t necessarily try to pop all the bubbles right away.
Simply place the paper on top, apply very light pressure, and then wait.
Some bubbles will burst immediately.
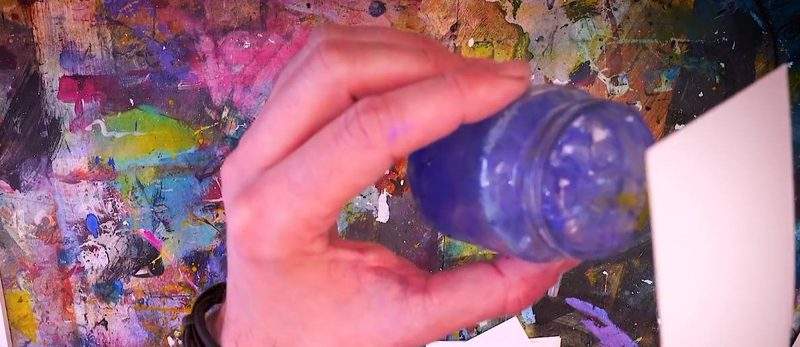
Others will stay on the paper for a few seconds before bursting.
And sometimes it is the latter that yield the most interesting results.
You’ll see circles appear that are larger or smaller, more or less opaque, and with more or less paint on them.
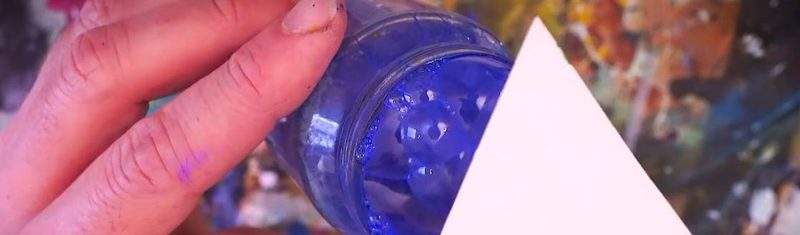
Move the sheet slightly and try again.
Before you know it, your surface will start to fill up with patterns.
Leave some room for chance
This is probably the most important tip in this exercise.
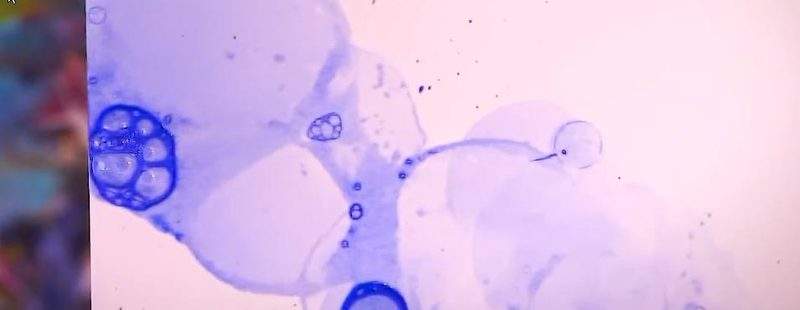
Don’t try to control everything.
Some bubbles will burst.
Some will burst too soon.
Sometimes you’ll apply too much paint in one spot.
A big bubble might create a trail that’s completely different from what you imagined.
It’s no big deal.
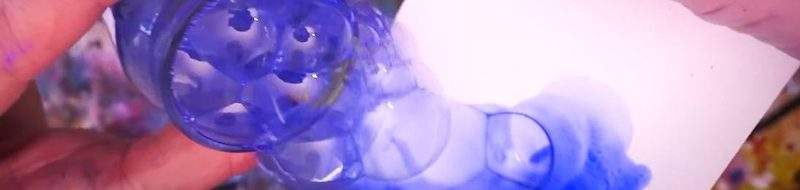
We are, in fact, in the process of experimenting.
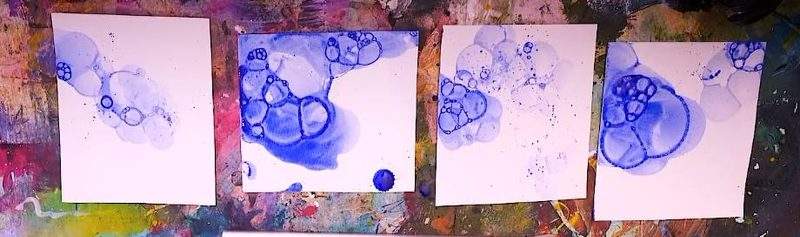
When I experiment with this kind of technique, I prefer to do several small test pieces rather than trying to get a perfect result on a canvas right away.
For example, cut the paper into four, five, or ten pieces.
Give it a try.
Adjust the amount of water slightly.
Add more paint.
Try blowing big bubbles, then small ones.
Let it dry.
You can then take your time looking at the results you like best.
Playing with Color Transparency
One of the most interesting aspects of this technique is transparency.
Bubbles do not necessarily leave a uniform layer of paint.
This naturally results in variations in intensity.
And when multiple prints overlap, new effects appear.
This is particularly interesting in abstract painting.
You can start with ultramarine blue, let it dry, and then start over with another color.
Some areas will overlap, creating some very interesting optical effects.
This approach is quite similar to that used in washes and glazes: the layers are applied on top of one another without necessarily completely covering what lies beneath.
How can you pop the bubbles faster?
Normally, I recommend letting the bubbles pop on their own.
But if you want to speed up the process a little, you can use a little heat.
For example:
- a hair dryer;
- or, alternatively, a heat gun used with extreme caution.
In both cases, keep your distance and use very little heat.
The goal is definitely not to heat the paint or the surface excessively, but simply to help the bubbles burst.
Personally, though, I think it’s a good idea to give them a little time.
Chance is part of the experience.
Turning these bubbles into a true abstract painting
Once your surface is dry, the real work can begin.
And that’s when this technique becomes much more interesting than just a fun exercise.
Look at your sheet of paper.
Certain shapes will immediately catch your eye.
You can then make changes to it.
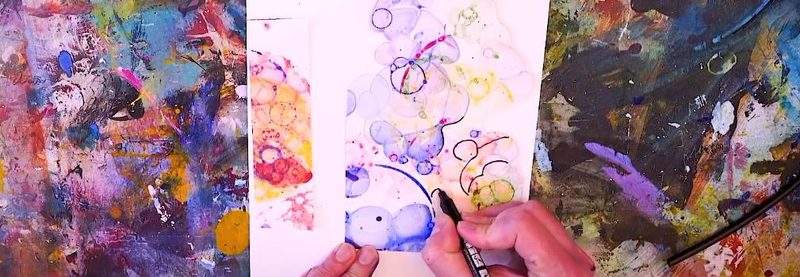
For example, you can use a black marker to trace the outlines of certain speech bubbles.
You can also cover certain areas with tape to create geometric shapes.
Or you could also add:
- a black outline;
- solid white areas;
- projections;
- transparent glazes;
- features;
- shadows;
- new textures.
You can also cut out certain parts of your experiments and incorporate them into a composition.
Let yourself be guided by what chance has given you.
You are no longer looking at a blank page.
You already have some visual material to respond to.
And that’s exactly why I like to experiment with this kind of technique: it makes it easier to take the leap into the creative process.
Can this technique be used on a large canvas?
Yes!
But the method needs to be adjusted slightly.
Using a small piece of paper, you can easily create a few bubbles in a glass or small container and then place your sheet of paper on top of them.
On a large canvas, it would obviously be much more complicated.
One solution, then, is to use a wider container.
Prepare your mixture in this container, create enough foam to cover the surface with bubbles, and then apply certain sections of your canvas directly onto it.
This way, you can apply the same principle on a much larger scale.
But I really recommend that you don’t start right away on your beautiful canvas!
Start small before moving on to the whiteboard
I know that when we discover a new technique, we immediately want to try it out on a piece of art.
But start by experimenting.
Take a few pieces of paper.
Try different concentrations.
Watch how the bubbles react.
Check the result after it has dried.
Next, try a second color.
Only once you begin to understand how your mixture works should you consider moving on to a larger scale.
This trial phase will save you a lot of frustration.
In abstract painting, experimentation is an integral part of the creative process.
It’s not necessarily about whether you succeed or fail at something.
Above all, it’s about discovering what a technique produces and thinking about how we can then make it our own.
An ideal technique for boosting creativity
This acrylic painting technique using bubbles is extremely simple.
And yet, it offers a wealth of possibilities.
It’s precisely this contrast that I like.
Using just a few very basic products, we can create complex shapes, transparencies, and layers that would have been very difficult to reproduce intentionally with a brush.
Above all, the bubbles give us a starting point.
Next, it’s up to us to decide what we want to do with it.
A work made entirely of bubbles?
A background for an abstract painting?
A geometric composition?
Shapes redrawn with a marker?
Glazes and splatters?
There is no right answer.
Experiment, observe, and let the results guide you.
It is often by experimenting with very simple techniques that we discover new avenues for developing our own artistic language.
So, now it’s your turn to blow bubbles!
And if you try this technique, feel free to share your experience and let me know what results you got.






Leave a Reply