
When we think of acrylic painting, we immediately picture paintbrushes or painting knives. However, there are a multitude of other tools that can be used to create unique effects.
And among them, there’s one that I particularly like: the sponge.
Simple, economical, and above all very intuitive, it lets you create textures, gradients, material effects, and even particularly interesting abstract backgrounds.
In this tutorial, I’ll show you how to paint with a sponge using acrylic paint, as well as how to prepare your sponge and explore different ways to use it.
And you’ll see: there’s no need to buy expensive equipment!
Why use a sponge when painting with acrylics?
The sponge has a particularly interesting characteristic: its surface is irregular.
Unlike a paintbrush, it does not apply the paint perfectly evenly.
Its various irregularities will hold varying amounts of paint and naturally create:
- textures;
- color variations;
- transitions;
- texture effects;
- areas that are more or less opaque;
- fog or cloud effects.
It is precisely this element of unpredictability that makes its use so interesting in abstract painting.
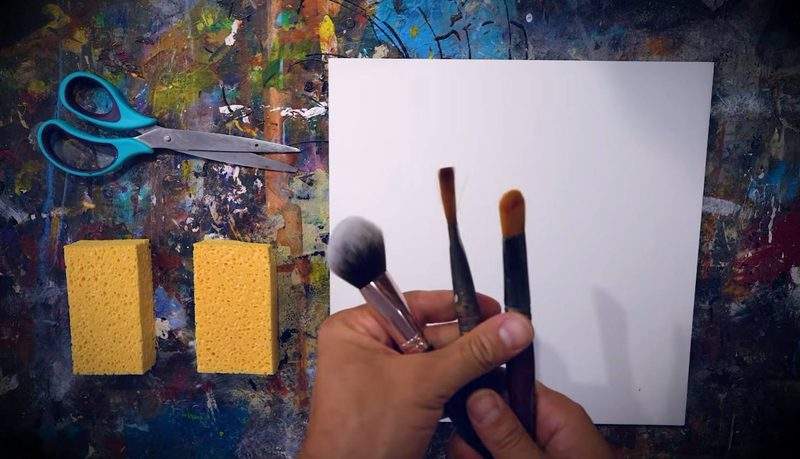
The sponge encourages you to let go and work more intuitively.
So when you’re stuck for ideas in front of your canvas, it’s also a great tool for regaining your spontaneity.
No need to buy a special fine-arts sponge
You’ve probably seen sponges specifically designed for painting in art supply stores.
Personally, I often find that unnecessary.
A standard, inexpensive vegetable sponge works just fine. You can find them for a few tens of centimes and get excellent results.
You just have to prepare it properly.
The Must-Know Tip: Round Off Your Sponge
A rectangular sponge used as is presents a minor problem.
When you tap your canvas, its corners may leave very distinct marks.
You may then find that the shape of your sponge shows up in your painting.
And generally speaking, that’s not what we’re looking for!
The solution is extremely simple.
Take a pair of scissors and gradually cut off the corners of your sponge.
You can shape it:
- round;
- oval;
- irregular.
It’s absolutely not necessary to get everything perfect.

On the contrary!
A slightly irregular shape can produce even more interesting textures.
Don’t throw away the scraps!
When I cut up my sponges, I also like to save some of the small pieces.
Why?
Because they can then become real little precision tools.
For example, a small piece of sponge can be used to create a few highlights, dots, small textures, or details that are impossible to achieve with a large sponge.
In painting, almost anything can become a tool!
How do you use a sponge with acrylic paint?
There are several ways to work.
1. Tap
This is probably the most interesting technique.
Lightly load your sponge with paint, then gently dab the surface of your canvas.
Depending on which part of the sponge you use, you’ll get very different results.
You can work with:
- the supermarket;
- the sides;
- the tip;
- a rounded corner;
- a small piece cut out.
A single sponge can therefore be used to go from very broad strokes to much finer details.
2. Scrub
You can also drag or gently rub the sponge across the canvas.
This method is particularly useful for creating transitions or effects similar to glazing.
With very little paint and, if necessary, a small amount of water, you can create areas that are lightly colored and translucent.
3. Blend
If an area seems too pronounced, you can also use the sponge to soften it.
By continuing to dab without adding more paint, you’ll gradually stretch and blend the color.
This is a great way to create gradients with acrylic paint.
Example: Creating a galaxy-style background with a sponge
To show you this technique, I’ve chosen a very simple exercise: creating a sort of night sky or galaxy.
The goal is not necessarily to create a highly detailed figurative work.
It’s mostly about experimenting.
Step 1: Prepare a dark background
I start by creating a mostly black background, to which I add a small amount of blue.

Even though the blue is almost invisible at first, it’s important.
It’s something I often say: a color doesn’t have to be immediately recognizable to have an impact on the final result.
It’s exactly like when you make a gray.
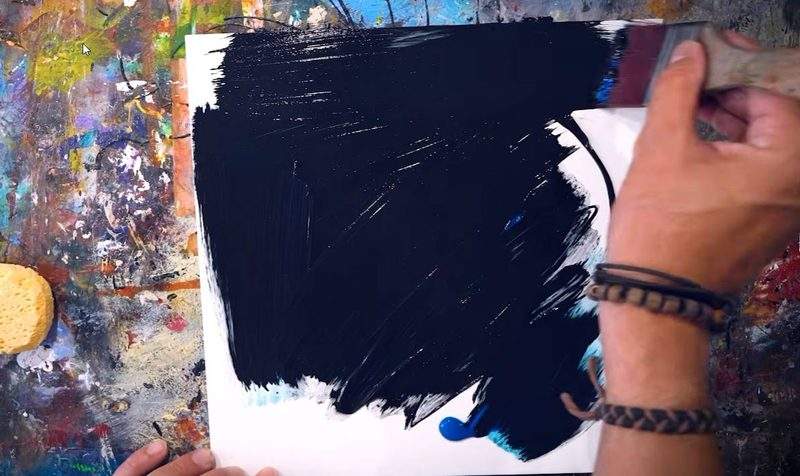
A slightly bluish, pinkish, or yellowish gray may seem almost neutral when viewed on its own, but it will contribute greatly to the overall harmony of the painting.
Step 2: Create an initial texture
While the paint is still workable, I tap my background lightly with the sponge.
Right away, the surface becomes more interesting.

The sponge naturally creates a multitude of small irregularities.
It almost feels like there’s texture there, even though we didn’t use any modeling paste, mortar, or other texturing products.
This first layer is our working area.
Then I let it dry.
Step 3: Gradually add the blue
Once the background is dry, I go back to using my blue.
I lightly dampen my sponge and start dabbing certain areas.

The key is to avoid covering the entire surface evenly.
I’m more interested in creating mass.
I can apply more paint to the center of an area and then continue dabbing around it without picking up any more paint.
Little by little, the amount of pigment naturally decreases.
This creates a very smooth transition.
This is a great technique for creating a gradient without a brush.
Step 4: Work in successive layers
This is probably one of the most important points in this demonstration.
With acrylic paint, there’s no need to try to get everything right in a single coat.
On the contrary.
Acrylic paint dries quickly—so make the most of it!

I prefer to build my painting gradually.
I’m applying a first coat of relatively dark blue.
I’ll let it dry.
Then I add a little white to my mixture.
I then come back with this new, clearer value, but on a smaller area.
And here I go again.
The lighter the colors become, the smaller the areas I work on.
This sequence of values gradually creates depth and light.
An essential rule: Don’t use too much paint
When using a sponge, always start with a relatively small amount of paint.
It’s much easier to add more than to take some away.
If an area becomes too dark, you can also lightly wipe your sponge and then go back and dab it again.
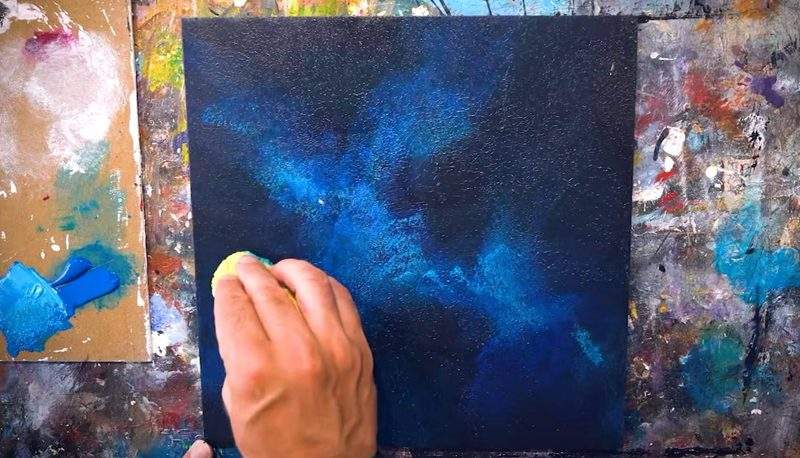
This will help make the transition smoother.
And if necessary, adding a very small amount of water can create a more transparent effect, similar to a glaze.
But be careful: just a little water is enough.
Constantly analyze your chart
Painting intuitively does not mean painting without thinking.
In fact, it’s exactly the opposite.
Throughout the entire process, I observe what’s happening.
I wonder:
Should this area be lighter?
Do I need more contrast?
Should I stop here?
What will happen when I add the next layer?
This ability to anticipate the next steps is fundamental in acrylic painting.
With experience, you no longer look at your painting solely as it is right now.
You’re starting to imagine what it will look like after two, three, or four more coats.
Add the finishing touches of light
Once I’ve applied my various layers of blue, I can add more white to my mixture.
This time, I’m working on much smaller surfaces.
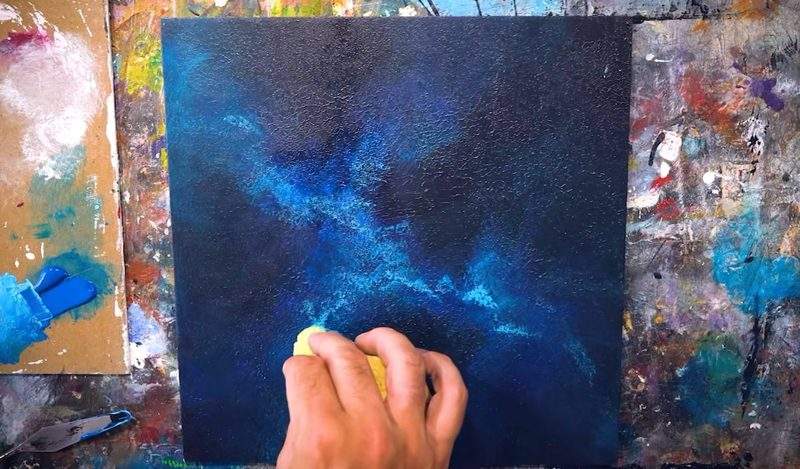
Just a few taps are all it takes.
These very light brushstrokes become the highlights of the composition and immediately add much more depth to the painting.
Again, there’s no need to put it everywhere.
Light works precisely because it contrasts with the dark areas.
A toothbrush for making stars
To finish this exercise, I’m using another extremely simple object: an old toothbrush.

I mix the white paint until it’s fluid enough, then lightly load the bristles of the brush.
I then use my thumb to splatter tiny droplets onto the canvas.
In just a few seconds, our abstract background takes on the appearance of a real starry sky.

Rather than painting each star individually with a brush, this technique produces a much more natural distribution.
And best of all, it’s really fast!
Topcoat can completely transform your colors
When acrylic paint dries, the colors may appear duller and more matte.
That’s normal.

It is therefore also important to plan ahead for the varnishing stage.
In my demonstration, I deliberately apply varnish only to a small part of the painting.
The difference is immediately apparent.
The blacks regain their depth.
The blues are getting more intense.
The subtle nuances that were barely discernible are reappearing.
Varnish, therefore, does not serve solely to protect a work of art; it also plays a major role in its final appearance.
Why I Love Sponge Painting So Much
What I appreciate most about this technique is, above all, the freedom it offers.
You don’t need to master an extremely precise movement.
You can give it a try.
Tap.
Scrub.
Blend.
Overlay.
Switch sides.
Cut out your sponge.
And above all, observe what’s happening.
In fact, some of the techniques used during this demonstration weren’t even planned from the start.
It was after looking at the result that I decided to rub certain areas or add some small glazes.
And that’s exactly what I love about abstract painting.
Combine the sponge technique with your other techniques
Of course, the goal isn’t to permanently replace your brushes and palette knives with a sponge!
On the contrary.
Instead, try combining different techniques.
You can link:
- sponge painting;
- paintbrushes;
- painting knives;
- glaze;
- projections;
- textures;
- modeling paste;
- mixed media.
This will greatly enrich your artistic vocabulary.
A simple sponge then becomes another tool at your disposal for expressing your ideas and creativity.
It’s up to you to give it a try!
If you’ve never tried sponge painting with acrylics, just grab a small canvas, a few colors, and an inexpensive sponge.
Don’t try to create a masterpiece right away.
Turn it into an exercise.
Try using different amounts of paint.
Try different parts of the sponge.
Overlay multiple values.
Rub certain areas.
Tap a few more.
And see what happens.
You might be surprised by the results.
Painting is also about this: accepting that you can’t control everything.
So trust yourself, follow your instincts, and above all…
Treat yourself!







Leave a Reply